- Home
- Radon FAQ
- Passive Radon System Troubshoot
- Radon Passive System
Radon Passive System Design
A radon passive system is an effective method reducing radon levels in a home. Studies have shown radon reductions from 30% to 50% are possible. With an estimated cost of only $350 to $500 and the possibility of avoiding the electricity needed to power a radon fan 24/7 this can be substantial savings over the life of your home.
In some parts of the country a radon passive system or Radon Resistant New Construction is a required component in new homes. If it's not part of the building code and high radon levels are found in your area why not consider a system for your home.

Radon Passive System Guidelines
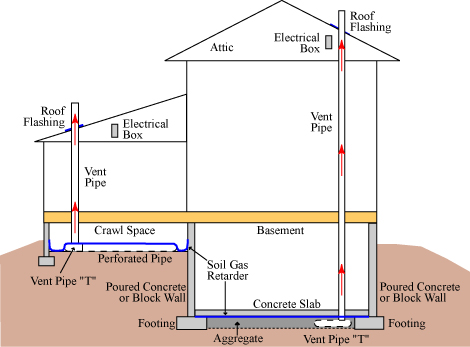
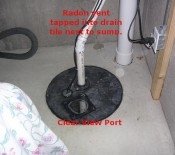
- Before the concrete floor is poured in the basement a permeable layer of gravel (1/4" or larger) needs to be used for the final grading. This will allow the radon to move below the house to a vent pipe. This can also be accomplished by using perforated drain pipe inside the interior of the footer and include a few runs across the middle, if the basement square footage is larger than 1500 sq ft.
- Next the radon pipe (3"or 4" PVC) is installed in location that will allow the pipe run through an interior wall to the roof. The efficiency of the system is greatest if the pipe can be run straight to the roof with no horizontal runs. A "T" fitting is glued on the bottom of the pipe and is inserted in the gravel. If drain tile is used the pipe is fasten to it.
- If a large section of the basement is crawlspace with exposed soil this area will need to be covered with a sturdy 6mil plastic that is sealed to the walls and a pipe inserted also. My experience is that with a small crawlspace or spaces these would only need to be covered and sealed. No pipe is needed.
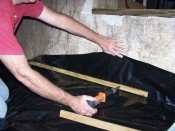
- Before the concrete is poured a 6mil poly covers the soil or gravel. The poly is overlapped by 12". This not only helps contain the radon but also help keep ground moisture from migrating up into the concrete slab.
- After the floor is poured urethane caulk is used to seal all cracks and expansion joints

- Where the pipe exits the roof it must at least 10 feet from any windows that can be opened. The radon pipe needs to be at least 12" above the plane of the roof.
- Finally have the electrician place an outlet in the attic less than 6 feet from the radon pipe. If a fan is needed in the future you are all set to just plug it in.
Please remember this is a passive system and once the home is complete a radon test
needs to be performed. But to fix a problem now is very straight
forward and good results are easy to obtain. Also keep in mind that
highest levels usually occur in the winter months, so you may want to do
another test at that time as well. Learn how to test for radon gas...
If
you would like some advice concerning radon resistant new construction
for your particular situation please contact me, I'd be glad to help you
out. Contact me here...
Activating a Radon Passive System
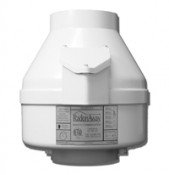
If your system was installed correctly installing a fan is very simple. In most cases a low wattage inexpensive fan can be installed. We often recommend the Radonaway RP145 fan.
The installation usually occurs where the pipe passes through the attic of the house or sometimes the garage. A section of pipe will be removed and the fan attached inline with the pipe using rubber couplings. The can plugged in to a 120v outlet. A varmint guard needs to place on the exhaust end of the pipe to keep small animals and acorns out of the fan. And finally a manometer will be placed on a visible section of pipe to view the fans operation. This is usually placed in the basement or garage. A follow up radon test is recommended to verify that the passive radon mitigation system was installed correctly.
Go here for more information on troubleshooting a passive radon system that has been activated.


New! Comments
Have your say about what you just read! Leave me a comment in the box below.