- Home
- Radon FAQ
- Passive Radon System Troubshoot
- Radon Crawl Space
Radon and a Crawl Space
Many homes have areas of open soil which are often refereed to as crawl spaces. These areas can be a major entry point for radon gas and a breeding ground for a host of other indoor air quality problems. So sealing of these areas is always advisable with either cement or a durable membrane. But of course this is not always possible due to limited working room or perhaps budget.
Well here is what I have found....
If you have a lower basement with a cement floor, you can try mitigating it first.
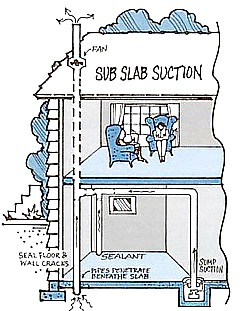
Many times by depressurizing this area only will take care of the radon
level in an uncovered crawlspace too. What actually can happen is the
pressure field will reach out under the area below the crawl space and
effectively stop the radon from rising up through it as well. But if you
can seal a dirt crawl space it can still be worth the effort and
expense to do so just to clean up the dirt, dust and smells associated
from these areas.
I recently did a radon mitigation in a house
with a combination crawl space and basement in Minneapolis, MN. The
levels in this home were quite high at 22pCi/L to 40pCi/L. But the
seller didn't want to pay extra to cover the 1200ft crawlspace so we put
1 suction point in the floor of the 1300ft lower basement and brought
the level down to 1.3pCi/L. She kept about $1500.00 in her bank account
and and new buyers were very pleased as well.
So you may have success by not mitigating a crawl space in conjunction with a full basement.
Radon Mitigation in a Crawl Space
First of all, working in a crawl space can be a nasty job! Be careful of hazardous materials like:
- asbestos
- sewage leaks
- spiders, snakes and four-legged creatures (if you see mice dropping, hantavirus could be a concern)
Protect yourself by:
- wearing protective clothing and HEPA filter mask is a good idea
- ventilating the area is advisable
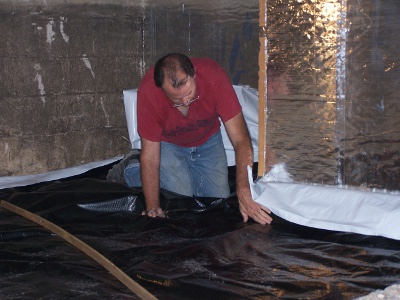
For sealing crawlspaces, I use is 6 mil or 12 mil Dura-Skrim vapor barrier that consists of two sheets of high strength polyethylene film laminated together with a third layer of molten polyethylene with diamond reinforced scrim. Basically this translates into English as a very durable plastic.
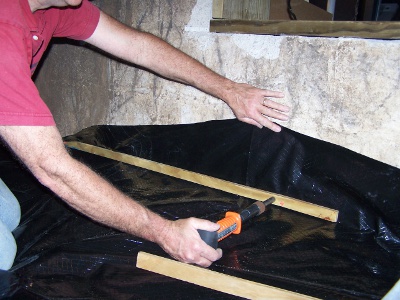
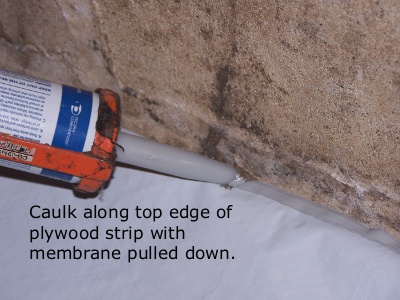
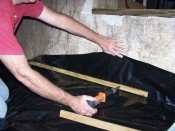
I use pressure treated strips of 1/2" plywood about 1 1/4 wide to fasten the plastic to the walls usually about 1' up the walls. I use a power load gun to shoot nails though the wood and plastic into the foundation. Then the excess gets folded down over the wood strip.
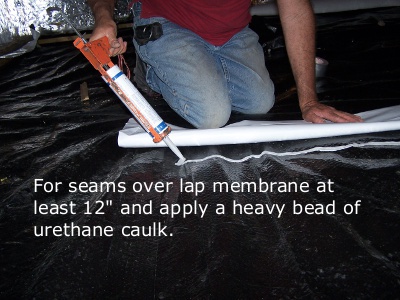
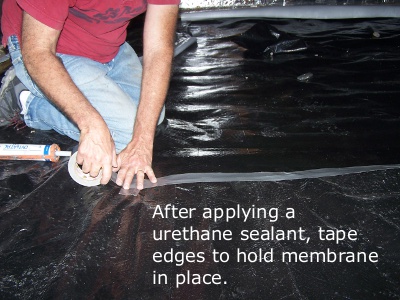
Then I run a bead of poly urethane caulk to seal along the top edge of wood and plastic where it meets the wall.
Here's how I do it....
(click on any photo for slideshow)
The membrane should run at least 12" up the walls. Plan for 12" overlaps where seams will be required. Be sure allow for extra material for sealing around posts and other obstacles.
I use a power nail gun to drive nails through the pressure treated strips, through the membrane and into the cement walls. Wear your safety glasses! I have found that #2 loads work best for block walls and #3 loads for poured cement.
If you have uneven areas you may have to use expanding foam to seal wide gaps. Sealing all areas is important so you don't suck air out of your house. This not only costs you money in higher energy bills but can be dangerous as back drafting of combustion appliance can occur. Make sure you have a CO detector if you don't own one already.
To learn how to design and install the radon vent to the crawl space please view this page...
More Radon Reduction Information
Radon Mitigation Diagrams & Photos | Radon Mitigation Design Considerations | Vent Pipe Guidelines | Choosing a Radon Fan | Radon and Crawl Spaces | Radon and Sumps




New! Comments
Have your say about what you just read! Leave me a comment in the box below.