

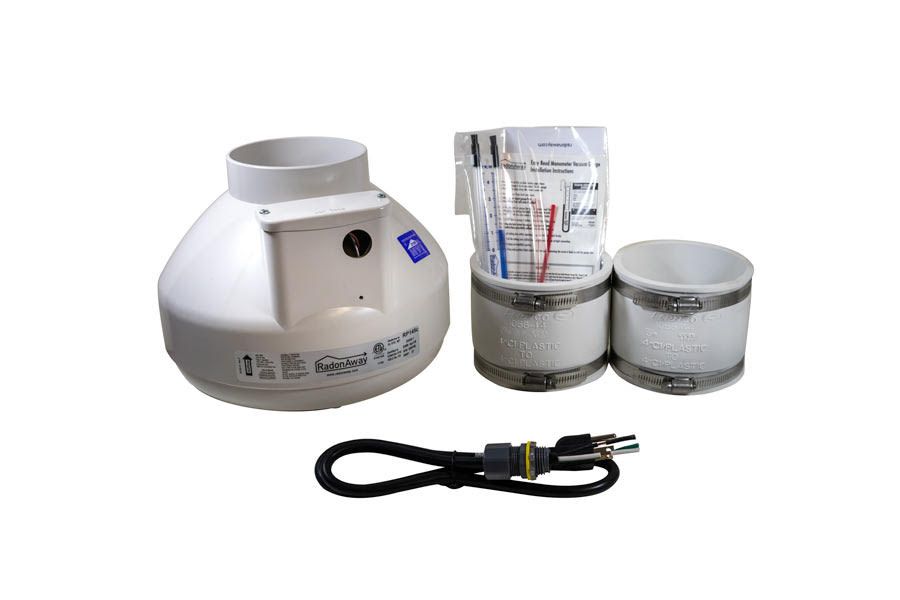
Here are a few radon mitigation system photos and diagrams to give you the general idea of what a system looks like and how it affects the appearance of a home.
The most desirably installed system will always be piped through the house to either the attic or an attached garage and not on the outside of the house. By doing so the amount of potential condensation produced will be decreased and the fan will have a longer life.
In colder climates, condensation in the winter will produce ice in the pipe above the fan therefore curtailing the systems ability to reduce radon in the building. Experience has shown that when temperatures drop below zero both day and night, there will be some decrease in system efficiency, regardless of where the fan is placed. But without a doubt the outdoor systems stay iced up longer and at higher temperatures.
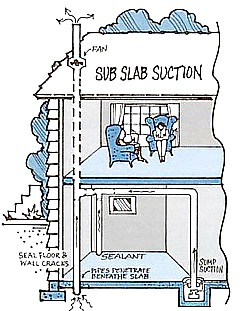
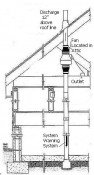
This shows some of the basic features of a system. Note... this is an outside example, which does have to be used in some cases. Only about 5% of the mitigation systems installed by our company end up on the outside of the house. Outside installations are much easier to install and more profitable from an installers point of view, so make sure the outside option is used only if you really need it!
Looking for mitigation equipment? See our Healthy Air Solutions Store or use the DIY Radon Checklist.

Over the years we have installed many radon systems. Here are some of our radon mitigation system photos for you to get an idea of what a radon system will look like in your home.
|
For Do-it-Yourself Radon Mitigation Information Click Here Notice the required system electrical shut off located below the fan.
Also a condensation bypass system is strongly recommended for outside
systems. These not only route water around the fan but also when a chuck
of ice comes sliding down it won't crash into the fan. The pipe
continues up through the roof and disperses the radon gas harmlessly
above the roof line. The pipe can pass through the roof but in some
cases the the pipe may leak if you have problems with ice dams. |
 |
 |
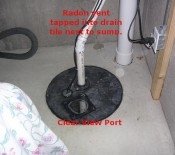
Here the radon pipe starts at the sump pump basin, which is sealed to maintain suction under the basement. Notice the black rubber coupling on the radon pipe. This allows for access to the sump basin. Sump and drain tile systems are often a very effective way mitigate high radon levels. Learn how to design a radon sump system here... |
|
Here is a sump cover ready for installation. It contains a cord seal and seal for the sump pump discharge pipe. I make an easy access port through the cover by installing a 4" removable plug. You never know when an emergency may occur. The removable 4" plug will let you wiggle the pump float or allow water in your basement to flow down in a hurry! Either the 3" or 4" coupling is installed based on the fan size you install. View items for a radon sump installations here... |
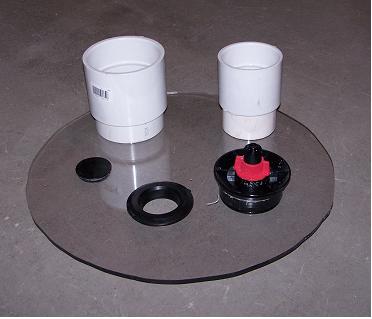 |

The suction point is often placed beside a sump pump pit to allow for easy access to the sump pump. The pipe is protruding about 4" below the cement, directly above the perforated pipe leading to the sump basin. The gap around the pipe will be sealed with a commercial grade polyurethane caulk. Also notice the small square of lexan installed on the sump cover. I use these to allow for viewing the water levels and as an access port to the pit. I normally install these on black covers; whereas, I like to use removable plugs, as seen above, for clear covers.
|
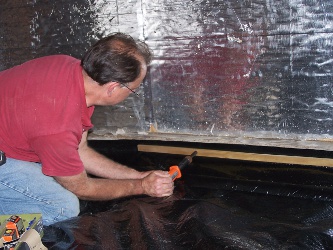
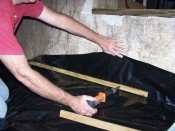
A crawlspace can present a number of issues from accessibility to just plain nasty working conditions. They are usually sealed when possible and a draw point added to the membrane. But often this may not be necessary to reduce a radon level to very low levels. Learn more here... |
 |
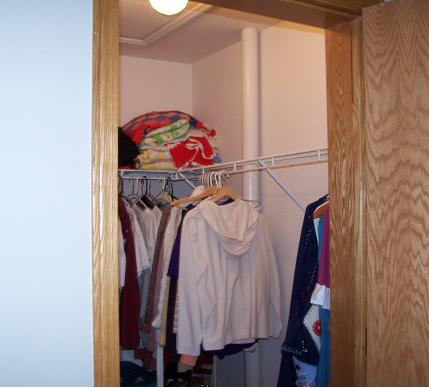
Radon mitigation systems can be run through closets, garages or a chase to the attic. Keeping vent pipes within the house will not only look better but will make a better system.
Outside system are suggested because of the ease of installation, but excess condensation and ice will often cause early fan failures. Also attaching pipe to the outside can transfer unwanted noise to the interior. Not good if it's your bedroom!
|
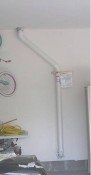
Here is a radon fan installed in the attic. The fan produces very little noise. In most cases only a slight hum is all that can be heard within the house, even at night when all is quiet. |
 |
 |
A manometer is placed on a visible section of pipe. It measures air pressure and flow. This assures you that the fan is functioning. This is a necessary component of a radon system since the fan is very quite. A periodic radon test will need to be performed to assure that your level stays where you want it. See this video for step-by-step instructions to install and read a manometer or check out this page. |

|
When a vent pipe passes through a fire rated wall such as the wall between the house and a garage an intumescent fire barrier is needed. What for?...if a fire starts in the garage the plastic pipe will melt first and the fire barrier will plug the hole where the pipe enters the house. This slows the spread of the fire into the house. |
 |
 |
This is the exit point of the of the pipe. The radon vents above the home and disperses into the atmosphere. A special cover is installed to protect the fan from debris and small animals. See how to install the pipe through the roof and more radon mitigation system photos here.... |
Have you installed your own radon system? Share your radon mitigation system photos and experiences here.
Radon Mitigation Diagrams and Photos | Radon Mitigation Design Considerations | Vent Pipe Guidelines | Choosing a Radon Fan | Radon and Crawl Spaces | Radon and Sumps
Design Pages |
Sep 30, 24 12:23 AM

May 20, 24 09:37 AM
Mar 21, 24 06:46 PM
By Val Riedman Copyright © 2007-2025 Indoor-Air-Health-Advisor.com
Build Your Own Website with Solo Build It!

New! Comments
Have your say about what you just read! Leave me a comment in the box below.